Passport photo maker: the photo is easy — the specification is the job
Anyone can take a head-and-shoulders photo. What an application actually judges is a written specification: the photo must measure exactly 2×2 inches, or 35×45 mm; the head must fill a stated percentage of the frame; the background must be a stated colour; and for online forms the file must land inside a kilobyte window — a maximum and a minimum. Miss any line of the spec and the nicest portrait in the world is rejected. A passport photo maker is therefore not a camera trick; it is a measuring instrument — and this article explains how it measures, using the official sources it shows you.
 By the PDFJadoo Team8 min read
The spec is a contract with four clauses
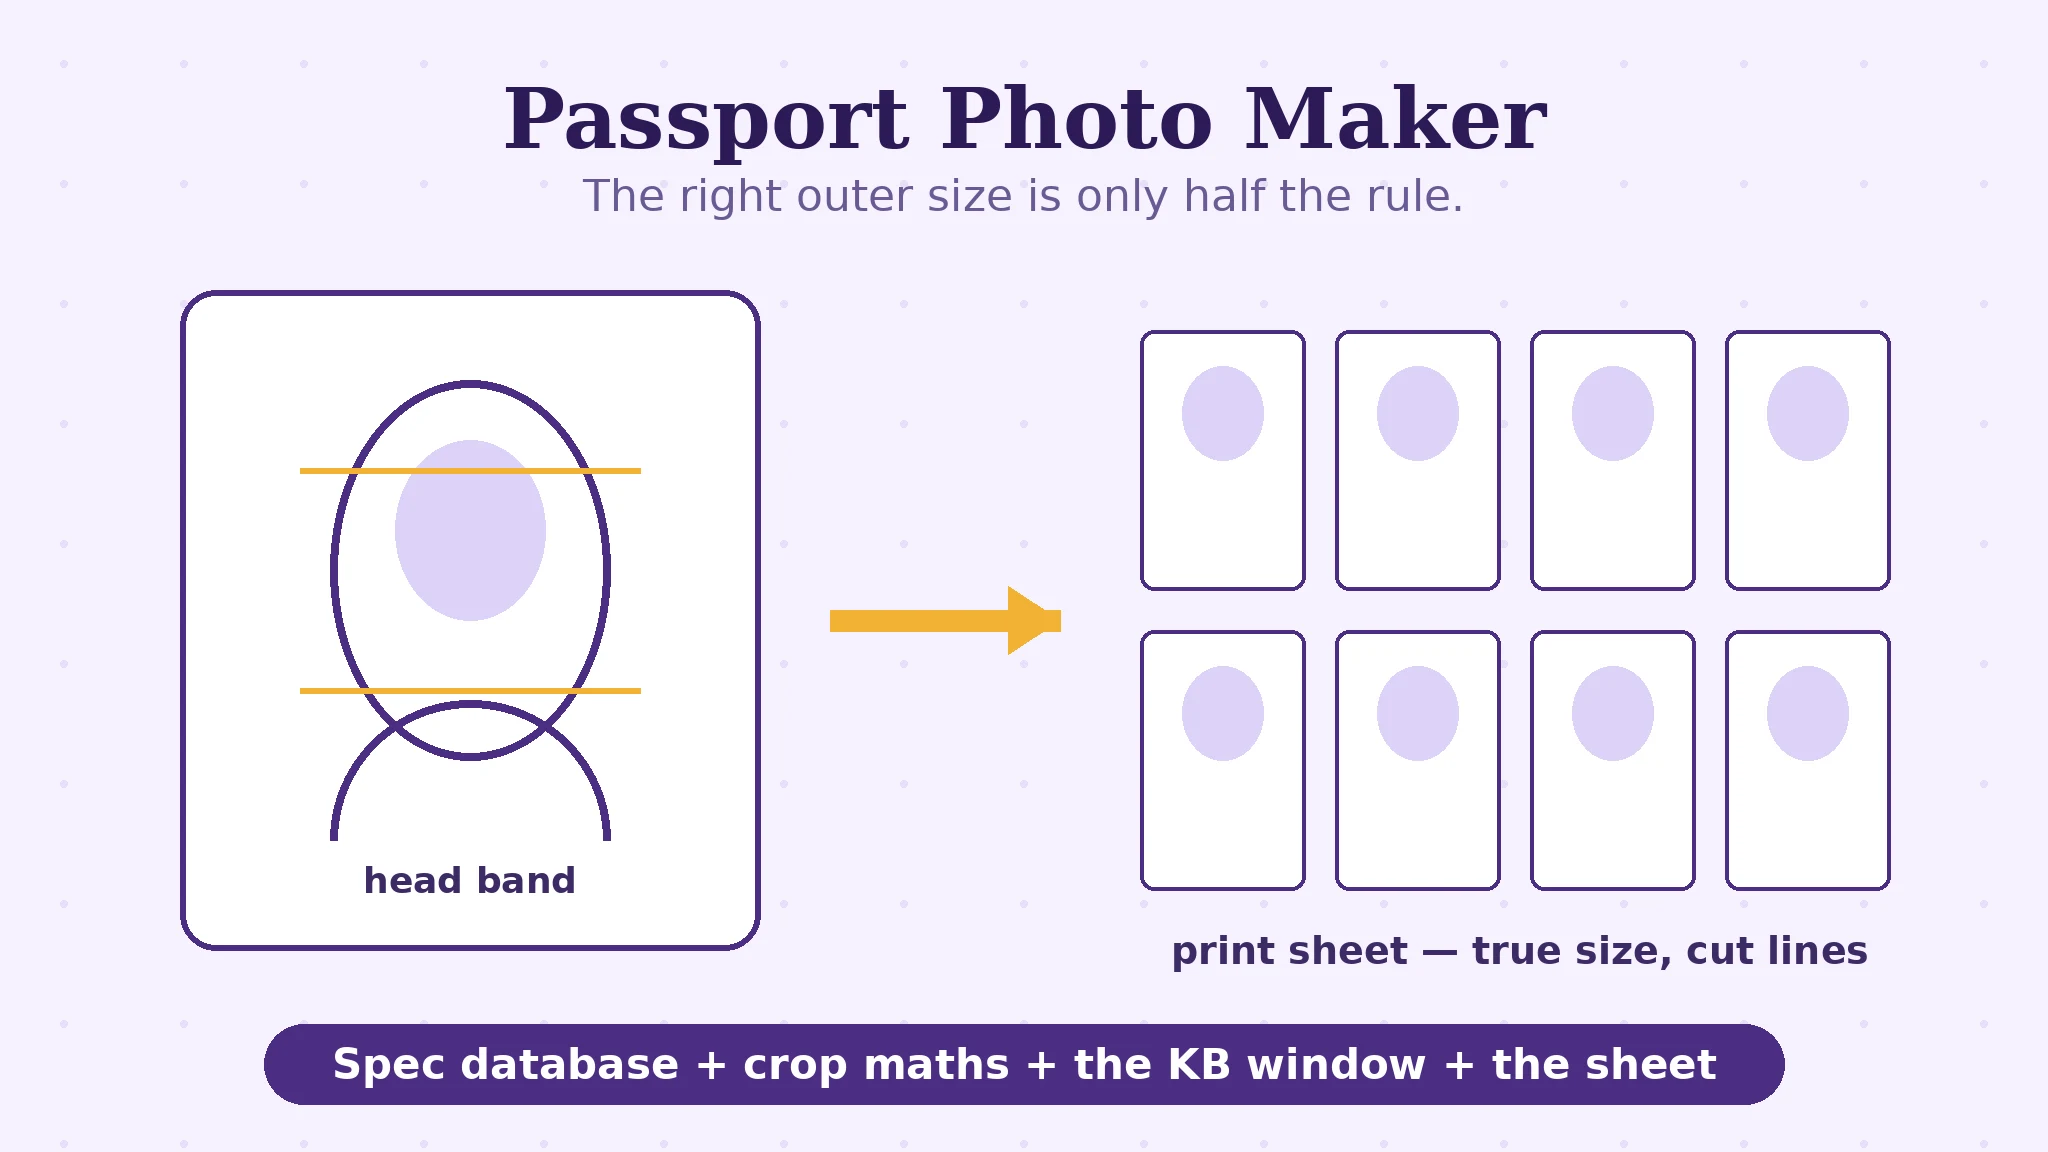
Every official photo requirement, whatever the country or document, is written in the same four clauses. Dimensions: the finished photo's physical size — 2×2 inches for US documents, 35×45 mm across much of the world, and dozens of variations for visas, exams and ID cards. Head height: not “head and shoulders, roughly”, but the head — chin to crown — occupying a stated share of the frame, often something like 50–69% or a millimetre band; this is the clause home photos fail most, because nobody eyeballs a percentage. Background and presentation: plain white or light, no shadows, face straight to camera, nothing worn that the rules forbid. File size, for online submissions: a window in kilobytes with both a ceiling and a floor — too heavy is rejected, and so is too light, which surprises everyone the first time.
Passport Photo Maker is built around that contract. It carries 70 document specifications — passports, visas, ID cards, exams and licences — and beside the specs it shows an official-sources panel: the requirement pages the numbers were taken from, so you can check the tool's figures against the authority's own words. That panel is the maker's honesty made visible, and this blog's earlier post, the passport photo size guide, walks the common documents' numbers; this article explains the machine that applies them.
How the maker applies the spec to your photo
The workflow is measurement, then adjustment. You choose the document — which loads its dimensions, head band, background and file window. You add a photo: upload one, or capture it in the page with the camera, where a guide overlay shaped from the spec — head outline, shoulder line — lets you stand in the right place before the shutter, which is far easier than rescuing a badly framed shot afterwards. Then you position the portrait inside the spec's frame: the crop is the document's exact proportions, and you scale and slide until the head sits inside its band. The maker handles the arithmetic of pixels and millimetres; your job is the framing judgement only a human can make — is that really how the head sits?
Two outputs then serve the two ways photos are submitted. The digital file is produced at the spec's pixel dimensions and inside its kilobyte window — the maker targets the window, floor included, rather than merely shrinking under the ceiling. The print sheet arranges multiple copies on a standard photo paper size (4×6 inch and friends) at true physical size, so a home or shop print comes out at exactly 35×45 mm per copy, ready to cut — no “fit to page” roulette at the printer, which is where home-printed photos quietly die.
The camera capture: guidance, with honest limits
Capturing in the page deserves its own paragraph, because its design is deliberately restrained. The overlay shows where the head and shoulders belong for the document you chose — the outline is drawn from that spec's head-height rule, not a generic oval — and the shutter is always yours to press. After capture, the cleanup is light correction only: exposure and glare are evened out; your face is not altered, and the background is not replaced. That restraint is not a missing feature. Official photos are identity documents; the authorities' own guidance warns against retouched photos, and a maker that beautified you would be manufacturing rejections. Stand in the outline, let the light be even, and the photo that results is you, measured — which is precisely what the spec asks for.
Make a passport photo, step by step
Step 1 — choose the document first. Open Passport Photo Maker and select the exact document — passport, visa, exam, licence — before touching a photo. The spec drives everything after.
Step 2 — check the sources if the stakes are high. The official-sources panel links the authority's own requirement page for that document. For a visa with a long processing time, thirty seconds there is cheap insurance.
Step 3 — capture or upload. In-page camera with the spec's overlay, against a plain light background in even light — or upload a photo that already meets the presentation rules.
Step 4 — fit the head to the band. Scale and position until chin-to-crown sits inside the frame's head zone. This is the clause that decides acceptance; take the extra ten seconds.
Step 5 — take both outputs. Download the digital file (right dimensions, inside the KB window) for the online form, and the print sheet at true size if paper copies are needed. Verify the digital file's size on your device before uploading it anywhere.
Measured against the official spec.
70 documents, their sources shown, a camera overlay drawn from the spec itself, digital files inside the KB window and print sheets at true size.
Open Passport Photo MakerA worked example: the exam form that wanted 20–50 KB
An exam application asks for a photograph: 35×45 mm proportions, and the upload window reads “file size: 20–50 KB”. The candidate's phone photo is 3.8 MB — seventy times too heavy — and the first instinct, a generic compressor, produces a 14 KB file: now too light, rejected by the floor nobody reads. This two-sided window is exactly what a spec-driven maker exists for: choose the exam document, frame the head to its band, and the output is produced inside the window — dimensioned, proportioned and weighted to the same spec the form will check. The example's lesson generalises to every clause: rejections are almost never about the face; they are about a measurement nobody made. Make the measurements the tool's job, and the photo becomes the easy part it always should have been.
Edge cases: where passport photos get rejected
The head band miss. Too small in the frame is the classic home-photo failure — the subject stood too far away. The overlay prevents it at capture; the crop fixes it after, within the photo's resolution limits.
Shadows and busy backgrounds. A bookshelf behind you fails the presentation clause no matter how perfect the measurements. Plain wall, even light, no shadow of the photographer across the face.
“Fit to page” printing. The sheet is laid out at true size; if the printer dialog offers scaling, it must be 100% / actual size. One wrong checkbox and every copy is 8% too large — measure the first print with a ruler.
Yesterday's spec. Authorities revise requirements. The maker shows its sources so you can confirm the current figures at the authority's page — for a document with months of processing behind it, that check is the cheapest step in the whole application.
Before you finish: the 60-second check
- The exact document was chosen before any photo was taken
- The official source was checked for high-stakes applications
- The photo was captured against a plain, light background in even light
- The head sits inside the spec's band — chin to crown, measured, not eyeballed
- The digital file's KB size was verified inside its window — floor and ceiling
- Print sheets were printed at 100% / actual size and the first copy measured
Fair questions
What size is a passport photo?
It depends on the document and country: US passports and visas use 2×2 inches (51×51 mm); much of the world uses 35×45 mm; exams, ID cards and licences each carry their own dimensions. The maker holds 70 document specs — choose your exact document and its dimensions, head band and file window load automatically.
Why does the online form reject my photo for being too small a file?
Many official upload windows specify a minimum as well as a maximum file size — a file compressed below the floor is rejected just as an oversized one is. A spec-driven maker targets the window itself, producing the file inside it rather than merely under the ceiling.
Can I take the photo with my phone camera in the tool?
Yes — the maker can capture in the page, showing a guide overlay (head outline and shoulder line) drawn from your chosen document's own head-height rule, so you stand in the right place before the shutter. Post-capture cleanup is light correction only; your face is never altered and the background is not replaced.
How do I print passport photos at home at the right size?
Use the print sheet output: it arranges multiple copies on standard photo paper (such as 4×6 inch) at true physical size. Print at 100% / actual size — never 'fit to page' — and measure the first copy with a ruler before cutting.
Where do the maker's specifications come from?
Each document's figures are taken from the issuing authority's published requirements, and the tool shows an official-sources panel linking those pages so you can verify the numbers yourself. Authorities do revise specs, so for high-stakes applications, check the source.
Does the tool change how I look in the photo?
No. Official photos must not be retouched — the authorities' own guidance says so. The maker measures, crops and lightly corrects exposure; it does not alter faces or replace backgrounds.
Tool behaviour — 70 document specifications, the official-sources panel, in-page camera capture with a spec-drawn overlay, light-correction-only cleanup, KB-window output and true-size print sheets — is from PDFJadoo's own Passport Photo Maker page. Common dimensions (2×2 inch, 35×45 mm) are the widely published official figures; always confirm your document's current spec at the authority's page, as the tool itself invites. Checked 18 November 2026.
Keep reading
Passport photo sizes, by document
The numbers post: dimensions and head rules for the common documents, in one table.
Compress a PDF without losing quality
Same measurement mindset, for documents: targets, windows and honest floors.
Print ID photos at home
The print sheet, given its own scenario: paper, scaling traps and the ruler check.
Photo too big for the form?
The KB window problem in full — ceilings, floors and the resize loop that wastes an evening.